If you’re a sucker for fresh, homemade bread but worry that soft loaves are too delicate for a camping trip, read on.
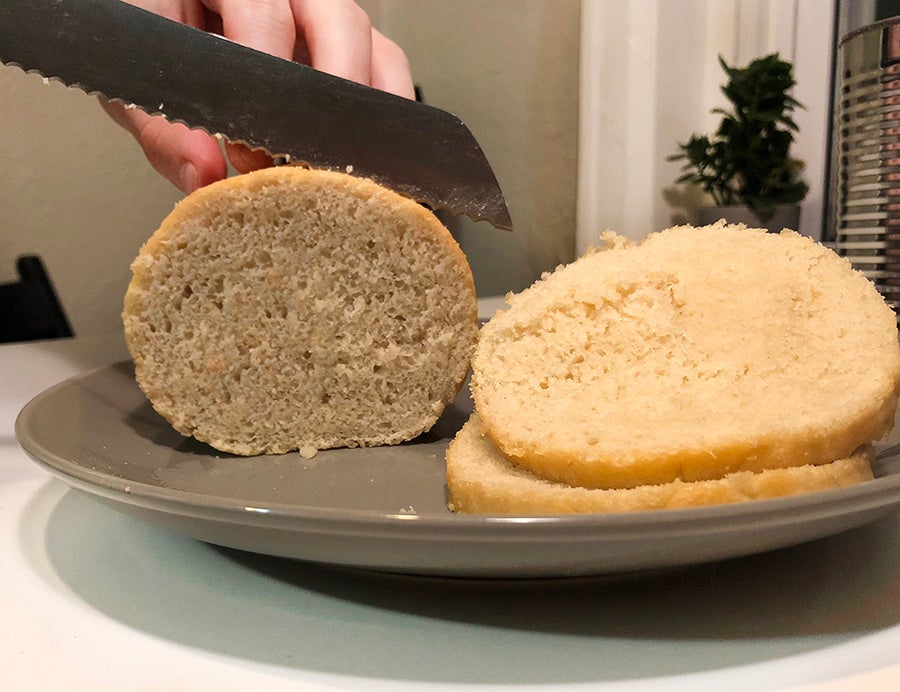
Baking a quick and easy campfire bread in a tin can will save you the heartache of opening up your backpack only to find a smashed mess. It may sound a bit quirky at first, but the tin can is light and easy to travel with but strong enough to protect the bread. As an added bonus, the ridges in the can serve as a perfect guide for making smooth, even slices.
How to Bake Campfire Bread in a Tin Can
This recipe will show you a quick and nearly-effortless way to prepare a loaf of tin can campfire bread. While we’re showing you how to prepare it at-home and bring it with you to the campground, we also have instructions listed for doing this at the campsite.
Side note: Be sure to check that the can you choose is BPA-free.
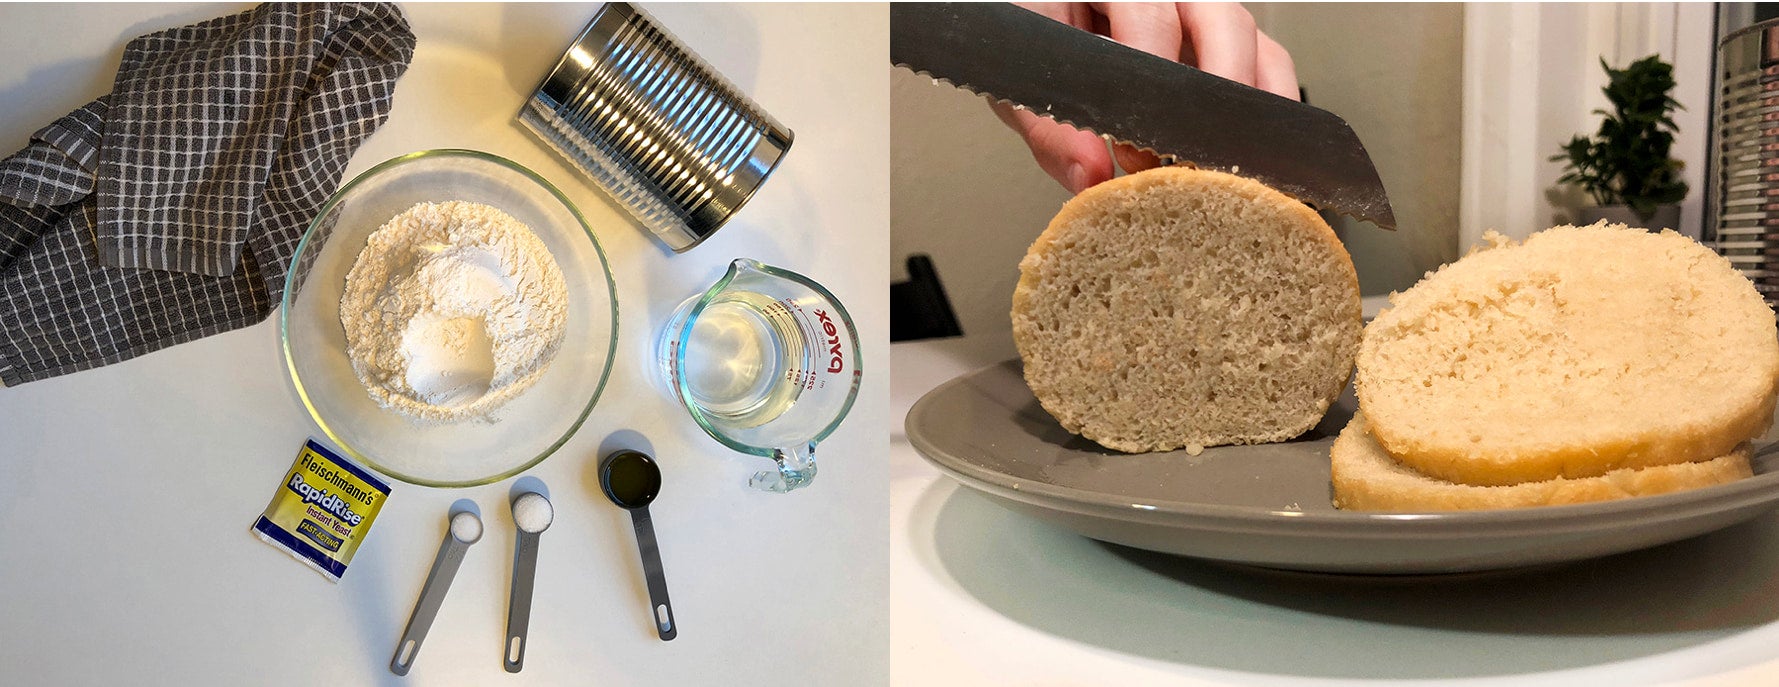
Easy Campfire Bread Ingredients:
- 1 cup warm water
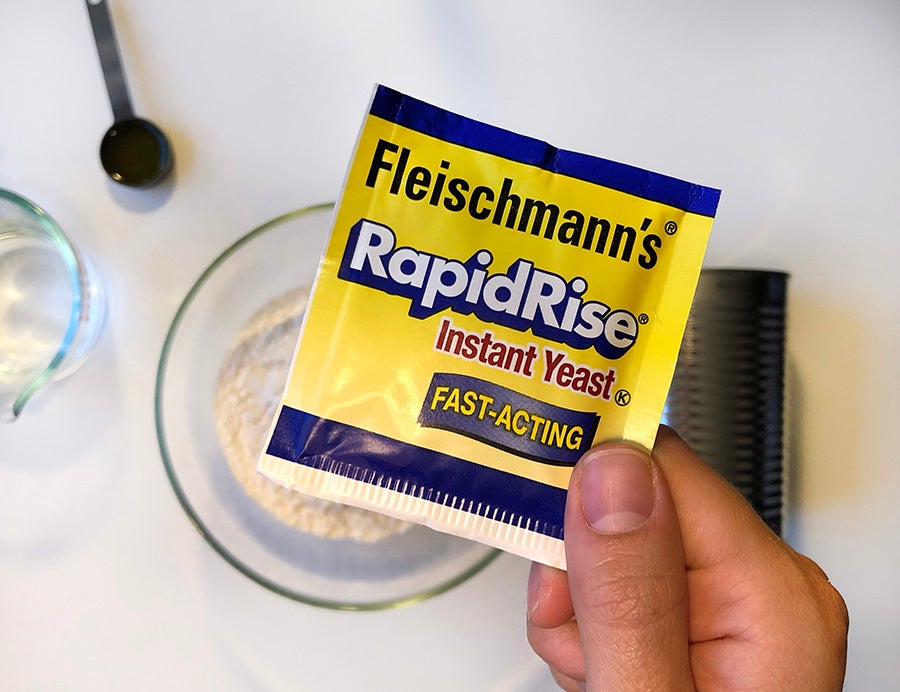
- 1 package (or tablespoon) instant dry yeast
- 1 tsp sugar
- 4 cups unbleached flour
- 1/2 tsp salt
- 2 tbsp butter or olive oil
The nice thing about this easy campfire bread is that you can make it at home or at your campsite. If you’re baking at home, preheat your oven to 400 degrees. If you’re making a true campfire bread on-site, you’ll need to start a campfire (a camping stove fire won’t cut it here) and bring an extra tin can with you—large enough to fit the first one inside.
Step 1: Activate the yeast
This is probably the hardest part of the recipe. Active dry yeast has to be activated before use. Otherwise, your bread won’t rise. To activate the yeast, add it to one cup of lukewarm water. Then, stir in one teaspoon of sugar and stir until everything is fully dissolved. Once the yeast and sugar are dissolved, cover the mixture and set it aside for 5-10 minutes.
If you’re camping, this step can be quite a hassle. If you’re not totally devoted to activating your own yeast, feel free to use instant yeast instead. It can be mixed in with your other dry ingredients, meaning you can skip that extra bowl if you’re low on space.
Step 2: Combine ingredients
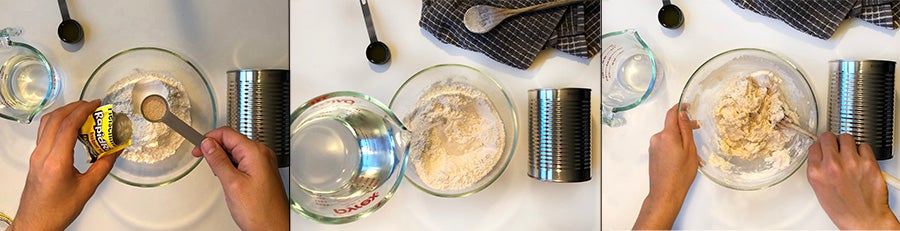
Set aside around a half cup flour for kneading. Then, combine the flour, sugar and salt in a bowl (and your instant yeast if you have it). If you used active dry yeast, pour in your activated yeast now. Next, slowly pour in lukewarm water until the mixture binds, but isn’t sticky.
Step 3: Knead the dough
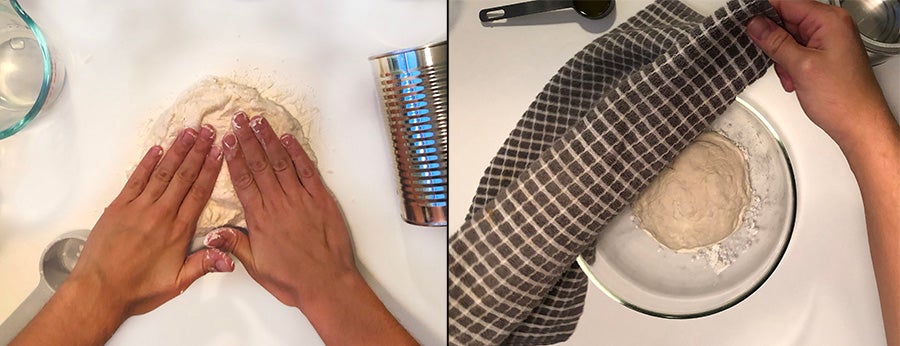
Once the ingredients are well stirred, dust your hands in flour and knead the dough until it becomes elastic and smooth. If you’re camping, you can cover any flat item (like the back of a pan or a plate) in foil to create a surface to knead the dough. Form the dough into a ball and set it back in the bowl. You can also dust a little flour on the outside of the dough if it still feels tacky. Leave it to rise for around 30 minutes.
Step 4: Place the dough in a can
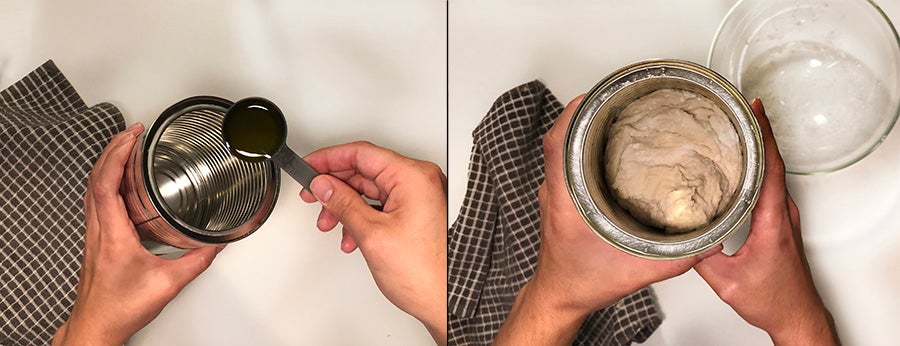
Once your dough has about doubled in size, place it in your well-oiled can. It should be about ¾ of the way full. Leave it to rise again for another 15-20 minutes. When it rises about a half-inch from the top of the can, it’s ready to bake.
Step 5: Bake that baby
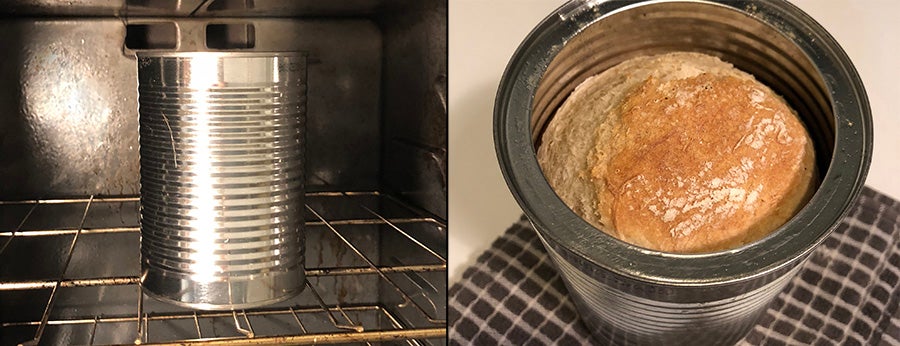
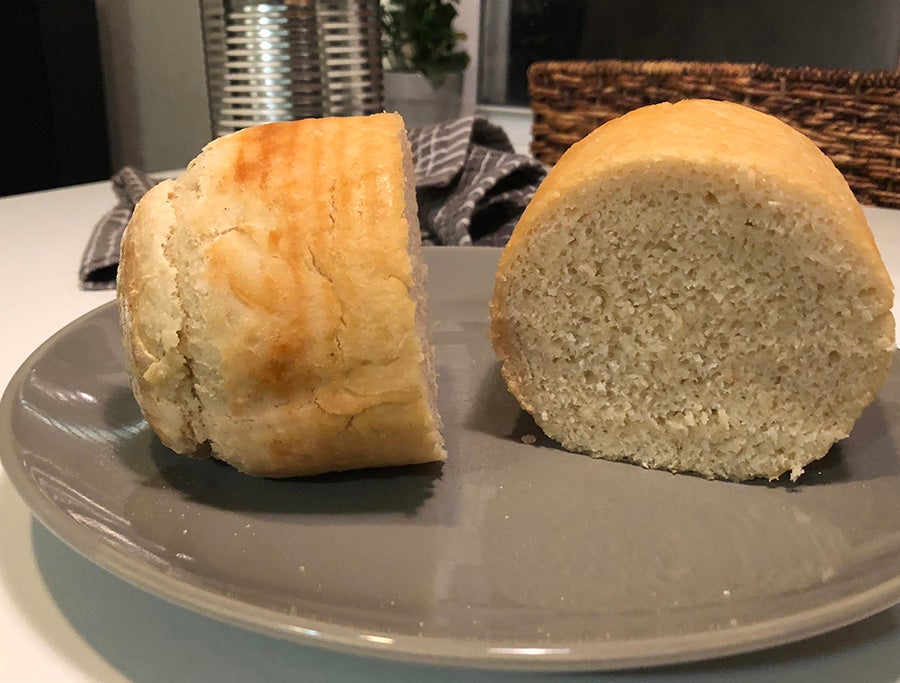
If you’re baking at home, place the tin can upright in the center rack and bake for 25-35 minutes. When the top is golden brown, or when you can stick a knife in the center and pull it out clean, the bread is ready.
If you’re baking bread on a campfire, it’ll take a little longer. Place around 1-2 inches of small rocks or sand in the bottom of the larger can, then set the small can inside. This will create enough distance for you to safely bake your campfire bread without charring the bottom of it. Then, poke a few holes in a piece of tin foil and place that on top. Next, use tongs to carefully insert the large can into the coals. Ideally, you want to set the can 2-3 inches deep into an area of dense, red coals. It should be fully baked in 40-60 minutes. You can peek under the foil after 40 minutes to see if the top is golden brown.
Once it’s ready, take the bread off the fire and let the can cool before handling. Not only is it hot, but if you try and pull the bread out too soon, it may rip. Letting it cool gives your campfire bread enough time to shrink a bit and solidify, making it much easier to get out of the can.
Other Tin Can Campfire Bread Recipes
This recipe is for pretty basic sandwich bread, but feel free to brighten up your campfire bread by swapping out the ingredients. You can use the same tin can to make banana bread, brown bread or even cornbread. Here are some quick ideas for what to throw in the can for better bread, ratios included.
Banana Campfire Bread:
- 2 cups flour
- 1 teaspoon baking soda
- ½ cup butter
- 3/4 cup brown sugar
- 2 eggs
- 1 teaspoon vanilla
- 2 overripe bananas, mashed
- Pinch of salt
Cinnamon Raisin Campfire Bread:
- 2 cups flour
- 1 teaspoon baking soda
- ½ cup butter
- 2/4 maple syrup
- 2 eggs
- 1 teaspoon cinnamon
- ½ cup raisins
Tin Can Cornbread:
- 1 egg
- 1 tbs sugar
- ⅓ cup milk
- ½ cup flour
- ½ cup cornmeal
- 1 tsp baking powder
- Salt and pepper
- Optional: whole corn and jalapeños
The possibilities for delicious campfire bread combos are nearly endless. If you use a can that came with a plastic lid (like a coffee can) you can simply slide the bread back in the container in and throw it in your backpack– safe and sound. Now go forth and enjoy your easy-peasy campfire bread!
The Dyrt is the only camping app with all of the public and private campgrounds, RV parks, and free camping locations in the United States. Download now for iOS and Android.Popular Articles:
Articles on The Dyrt Magazine may contain links to affiliate websites. The Dyrt receives an affiliate commission for any purchases made by using such links at no additional cost to you the consumer.