This guide to thru-hiking is brought to you by Primus, whose line of premier camping stoves have been the go-to option for campers and thru-hikers alike since 1892.
So you want to go thru-hiking? Fun! Or not fun (we’ll let you decide). Regardless, you’re in for a challenging adventure. Whether you’ve been pushed by the Wild-inspired rush of hikers to trails like the PCT (Pacific Crest Trail), AT (Appalachian Trail), or CDT (Continental Divide Trail), or a thru-hike is something you’ve always wanted to try, knowing where to start is a huge challenge.
The Ultimate Thru-Hiking Prep Guide
To get through the initial stages of prepping peril, we’ve created this quick, easy-to-follow roadmap to get you started:
First Things First: Commit!
It’s widely known that the vast majority of those who begin a thru-hiking experience, particularly the longest ones, don’t end up completing the trail all the way through. Even the John Muir trail (211 miles compared to the PCT’s 2650 miles) has a lower completion rate than you think, with many prospective hikers dropping out due to changing life circumstances, trail difficulty, unexpected severe weather, or issues with illness, food, or other resupply items. Some even drop out before the trip start date.
Whatever the reason, there’s no way to predict major life events, but before truly starting to prep for your thru-hiking adventure, make sure you’re as committed as you can be! It takes guts to accomplish a thru-hike of any length, and if you don’t have the commitment from the get-go, it will be hard to find the resolve stay on the trail when it’s pouring rain and your rain fly has mysteriously disappeared.
Make Permits a Priority
Remember the time you showed up to board your flight without a ticket? Each year, hundreds of hiker hopefuls attempt to enter major thru-hiking terminals without the necessary permits. Trails like the PCT are regulated according to a set number of visitors a day, both to help maintain the nature and wildlife around the trail as well as to prevent severe overcrowding. It also helps to ensure that those who pursue the thru-hiking experience possess at least the experience and commitment necessary to obtain a wilderness permit, thereby keeping the trails a little safer all year long.
Here is the thru-hiking permit information for the “major” thru-trails in the United States:
1. John Muir Trail Permits
Permits for the JMT are broken into two groups, Northern Terminus Hikers and Southern Terminus Hikers.
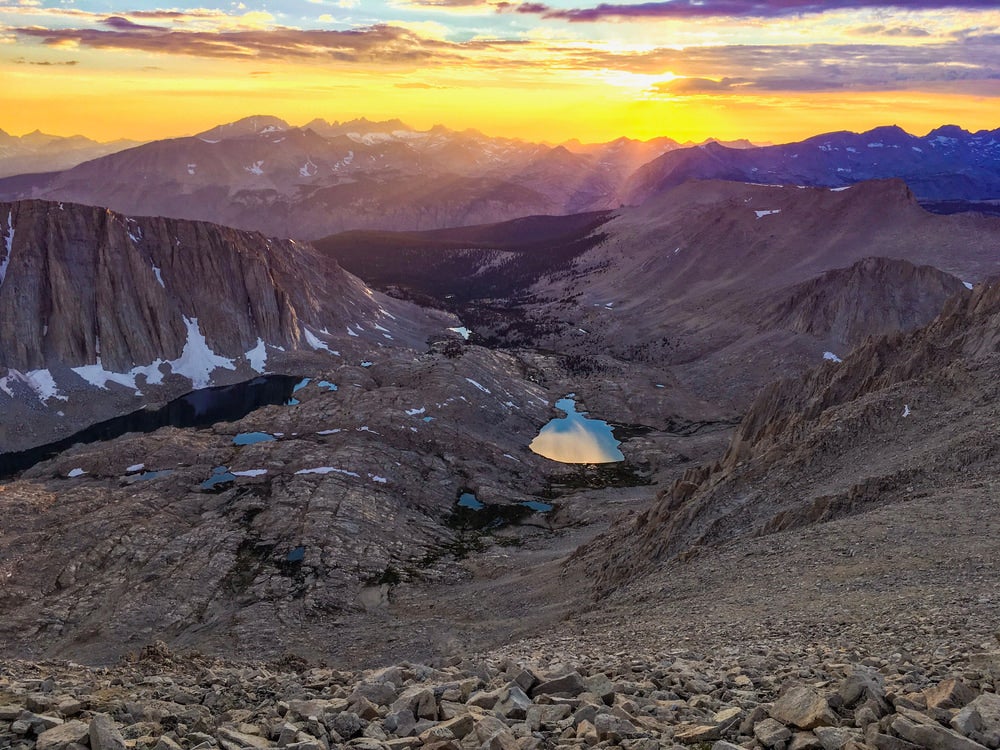
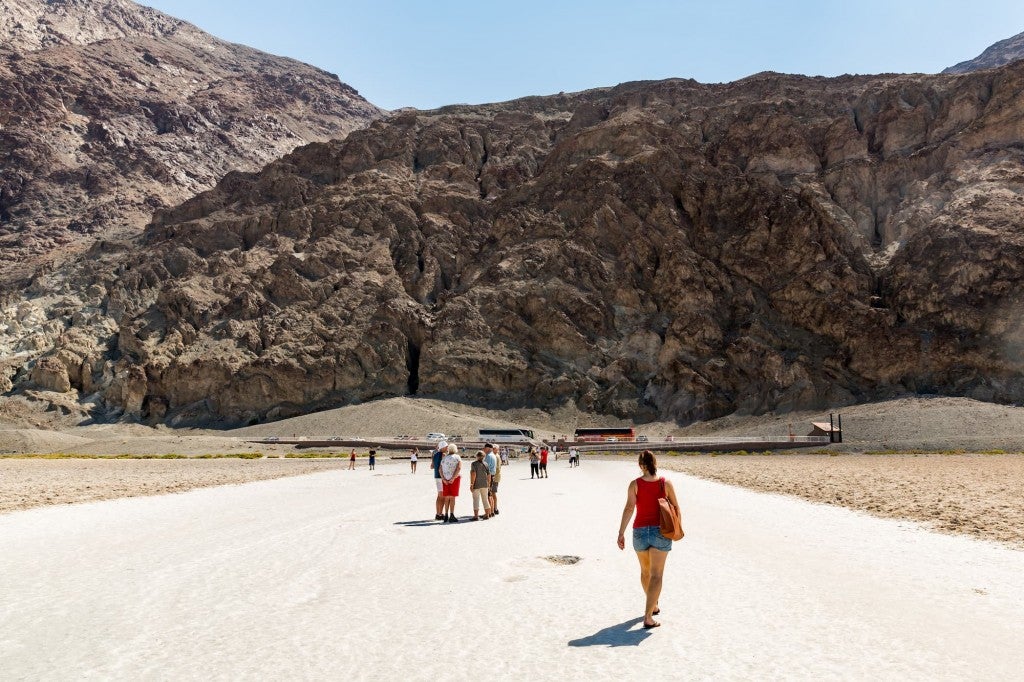
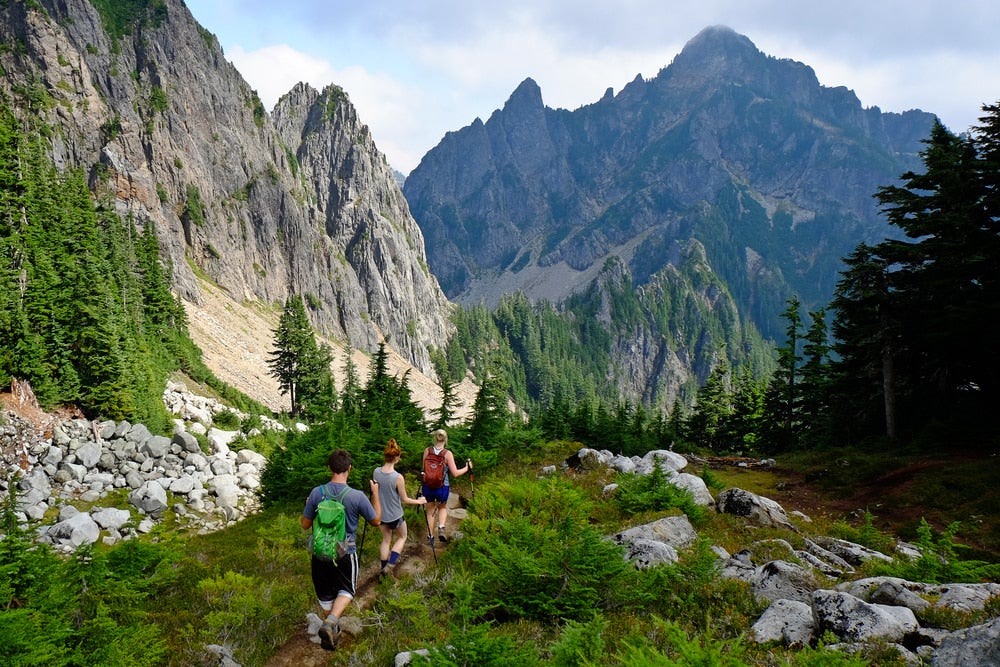
Photo from The Dyrt camper Emily Gallegos
Northern Terminus Hikers: Apply for a Yosemite permit (permits are given out 168 days or 24 weeks in advance). If you’re unable to procure a permit for the trail, a set number of day-of permits are given out from Happy Isles or Tuolomne Meadows Ranger Stations on a first-come, first-served basis. Due to extremely high demand in recent years, it’s advisable to obtain your permits as early as possible. The Yosemite permitting system, locations, and availability change each year, so we recommend checking their website for more details on where and when day-of permits will be issued.
Southern Terminus Hikers: All southern terminus hikers will need to obtain an Inyo National Forest permit prior to the start of their hike. Permits for the Whitney Portal are to be reserved via recreation.gov, and are issued on a lottery system. Applications for the lottery are accepted from February 1 to March 15, and often cover all start dates between July and September.
If you miss the lottery window, remaining spaces will be made available beginning April 1, when reservations can be made up to 2 days in advance of your trip by calling the Inyo National Forest Wilderness Permit Office or by registering online.
2. Pacific Crest Trail Permits
Permits for the PCT are issued in two different categories—for trips under 500 miles and trips over 500 miles.
For Trips Under 500 Miles:
Permitting varies for section-hikers, and is not always required depending on what portion of the hike you’re tackling. Generally speaking, the portions of the trail that require permits are managed by a national or state-level agency (i.e. National Forest Area, National Parks, State Parks, etc.). In California, permits are required for overnight visits on most sections of the PCT, and can be obtained from the agency that manages the section you’re planning to hike. In high-traffic areas (read John Muir Trail territory, portions of Yosemite), there are daily quotas that change depending on the season and number of last-minute cancellations, so planning ahead for your section hike is your best bet to getting a permit for the time frame you’re looking for. Specialized areas like Desolation Wilderness require a permit for day trips as well as an overnight permit. Day trip permits for Desolation are self-issued, quota-free, and can be found at the trailhead.
Permits in Oregon and Washington are slightly less stringent than California, and many are offered for free at the trailhead on a self-issue basis. There are permit boxes at each National Wilderness Area boundary. A new permit is required each time you pass through an agency boundary.
The ares in Oregon and Washington that require specialized permits for section hikers are as follows:
- Crater Lake National Park (permits obtained at the park visitor center)
- Obsidian Limited Entry Area
- Pamelia Lake Limited Entry Area
- North Cascades National Park
In general, even if you’re only doing a section of the PCT, you should plan your trip and itinerary as early as possible. If you’re unsure how or where to obtain a permit for a designated area, check on a map to see who manages that specific land area, and visit their website for direct links and permit issuance information.
Note: If your section of the PCT includes crossing the Canadian border, you will need to obtain a Canada PCT Entry Permit prior to your hike.
For Trips Over 500 Miles:
Ironically, permits for trips over 500 miles are slightly easier to obtain than section-based permits. Permits are free and required prior to starting your hike. The complicated factors in obtaining a PCT permit include managing the date on which you’d like to start your journey and working with the permit quota of 50 people per day. For hikers starting at the Mexican border, there are 35 of these 50 permits per day available beginning on November 14 at 10:30am PT. The remaining 15 permits are released on January 15 at 10:30am PT. Though we recommend you start planning your PCT thru-hiking journey well before these dates, there is no way to pre-apply for permits.
New in 2019, the PCT permit issuance system will include a waiting room, which will provide users with a place in a queue. This is a new feature meant to improve the often crowded and frustrating process of procuring permits for specific days on the trail. Each person in the queue will have 10 minutes to select and begin an application, and an additional 20 minutes to fill out the application, which normally takes less than 10 minutes. Providing inaccurate information on your permit application may result in a delay of approval or, in some cases denial, so double check your information prior to submitting the application.
3. Appalachian Trail Permits
Permits for the AT are slightly less stringent than those needed for the PCT, as a permit is not required to access the beginning of the AT as a hiker. That said, the following locations require permits depending on the season and hike type (section, thru-hiking, etc.).
Great Smoky Mountains National Park
Though thru-hiking folks are exempt from needing a backcountry reservation to camp in Great Smoky Mountains National Park, it is required that you camp in the provided backcountry shelters. Between the months of March and June, four spaces at each shelter within the park are reserved for thru-hikers. If the spaces at each shelter are full, you may camp in a tent close by to the shelters.
Permits for the Great Smoky Mountains can be acquired for $20 and are valid for 38 days from the date of issue for up to 8 days of hiking through the park. Thru-hikers are defined by Great Smoky Mountains National Park as hikers that plan to hike through the entirety of the park, and who travel only on the Appalachian Trail while inside the park.
Permits are available online or can be issued over the phone and sent to email or by snail mail. Printed copies of the permits are required at all times.
Shenandoah National Park
Backcountry permits are required for all thru-hikers. Permits are free and can be obtained at visitor stations throughout the park during normal business hours. Permits may also be self-issued at the north and south entrances to the park.
Sheltering rules at Shenandoah are similar to the Great Smoky Mountains. Day use shelters are available to hikers as well as overnight-use “huts” which are available to any “long-distance” hikers staying at least three nights in Shenandoah National Park. All the huts within the park have campsites available, and tent camping near the huts is permitted in designated areas only.
Pennsylvania Game Commission
For winter hikers on the AT, the Pennsylvania Game Commission requires at least 250 square inches of fluorescent orange to be worn at all times while within the state game land boundaries in Pennsylvania. Fluorescent clothing must be worn on the head, chest, and back areas, and must be visible from 360 degrees.
Thru-hikers are the only hikers allowed to camp on Pennsylvania Game Commission lands. Campsites must be within 200 feet of the AT at all times.
Green Mountain National Forest
The Green Mountain Club, which maintains the AT in the state of Vermont, collects fees at certain high-use campsites along the AT. No permits or reservations are otherwise required.
White Mountain National Forest
Campsite fees of $10 per person are charged at specific, maintained campsites in the White Mountain National Forest. Fifty percent discount programs for AT hikers are available online.
Baxter State Park
Permits are required for all AT long-distance hikers (whether or not you’re thru-hiking), and can be obtained in person at Baxter State Park headquarters or at Katahdin Stream Campground. All permits must be stamped at the Katahdin Stream Ranger Station.
Baxter State Park’s quota for AT permits is set at 3150, at which point the long-distance hiker campground will close for the year. Hikers still planning to hike through Baxter State Park after the quota has been met may obtain a day use parking reservation or a campground reservation.
4. Continental Divide Trail Permits
There is no single permit required for the entire Continental Divide Trail. Since the CDT is less frequently traveled than its thru-hiking cousins, there are only a few spots where permits are required.
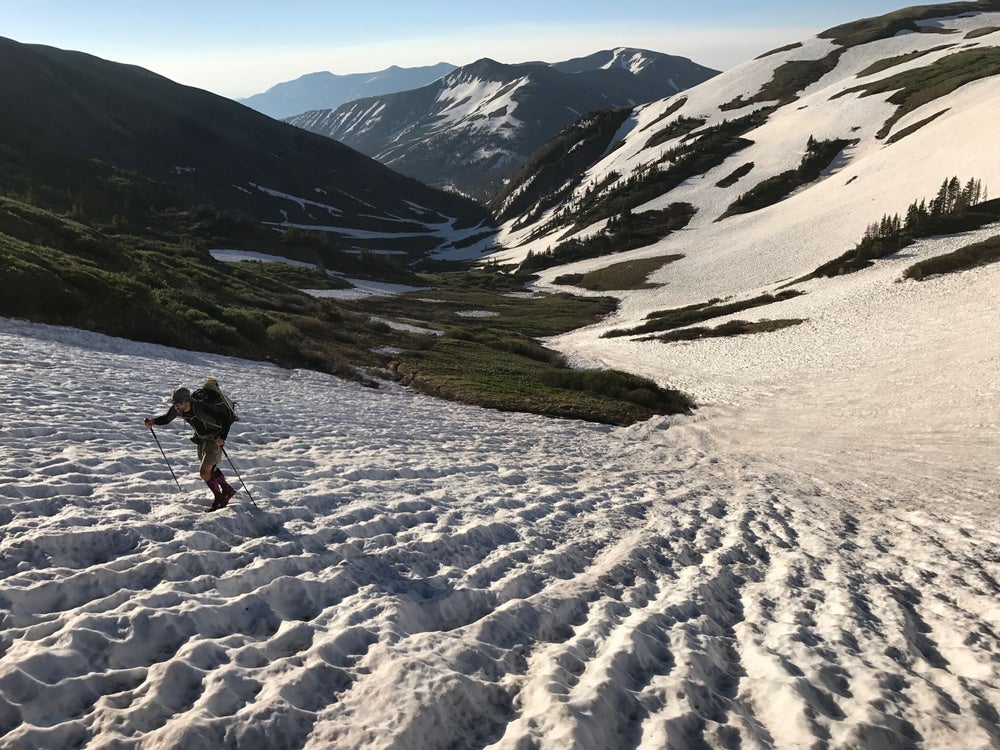
Photo from The Dyrt camper Shane von Schlemp
Glacier National Park
Glacier requires backcountry permits for all hikers planning to camp in the park. Backcountry permits are $7 a person per night. For advance reservations, visit the National Park Service’s website.
Only a specific number of backcountry sites are available at each location within Glacier. Thru hikers are advised to maintain varying itineraries in the case of campsites being full.
Yellowstone National Park
Yellowstone also requires backcountry permits for camping at $3 per person per night. Reservations can be made by calling 307-344-7311. Walk-up permits are also available, though they are difficult to obtain in peak CDT hiking season.
Rocky Mountain National Park
Permits and bear canisters are required for staying in Rocky Mountain National Park. Due to the price ($26 per person per night) and the length of the RMNP loop (25 miles), most hikers attempt to complete this section in a single day, to avoid camping in the park. Permits can be booked online. Bear canisters can be rented for single night use at the Never Summer Mountain Products store nearby Grand Lake, Colorado.
Indian Peaks Wilderness
Indian Peaks is a highly trafficked portion of the CDT, and camping is not permitted without a permit. Permits can be obtained via phone at 970-887-4100.
New Mexico State Lands
Access permits for all of New Mexico’s state lands can be purchased from the Commercial Leasing Division at $35 per person. Permits are valid for one year, and must be applied for online.
Other Permits
In specific National Forests along the trail, self-issue permits are required to be filled out at the trailhead.
Route and Gear Planning
The amount of time and research you put into planning your thru-hiking adventure is going to pay dividends in the middle of your trip. Here are a few things to focus on in the research phase, and a few things you’re better off not spending too much time on.
Do Get a Guidebook
Or five guidebooks. No matter what trail you’re planning to tackle, there will be many guidebooks available. Though you should definitely work with multiple sources of expertise, it’s critical that you take advice from folks who’ve accomplished what you’re trying to accomplish. Guidebooks often contain insight that goes beyond the basics of preparation; they can be invaluable resources when trying to plan out your hike.
Decide Your Route, Then Start Planning Your Gear
Are you a SoBo (South Bounder) going against the grain or a NoBo (North Bounder) looking for some sweet company? The route you choose for your thru-hiking journey depends greatly on the time of year you’re trying to start your hike as well as the weather and trail conditions you’re hoping to meet at the beginning and end of your journey.
SoBos on the CDT often catch Glacier shortly after the snow season, meaning there could be treacherous climbs through snowfields at the beginning of the hike. That said, they have the advantage of going through Colorado in the Fall, when the Aspens are basically everyone’s desktop background. They’ll also catch New Mexico at the end of their thru-hike when temperatures in the desert are cooler and much friendlier than the heat of the summer. NoBos, on the other hand, enjoy the warm temperatures at the beginning and the wildflowers of Colorado in the middle of their hike, but a late finish could mean freezing temperatures and immense snowfall in Montana.
Most major thru-hiking trails have options for “flip-flop” hikes, where hikers start at the southern or northern terminus, and at the midway point in the hike, go to the other end of the trail and hike back towards the middle. This can be effective if you’re looking to nail the weather in all locations but may detract from the experience for the thru-hiking purists. It also includes that added complication of figuring out how to get to the other end of the trail. While there aren’t official sponsored shuttles for this type of thing, most hikers will choose to purchase an airline ticket, as it’s the option that requires the least coordination (but probably the most money).
Choosing your route should be an educated decision made consciously on the basis of snowfall, seasonal accessibility in certain locations, and your desire to see and interact with other hikers. Don’t start your gear planning until you’ve decided on which way you’re going to walk, since your direction will definitely determine what gear you’ll need and when you’ll need it along the trail.
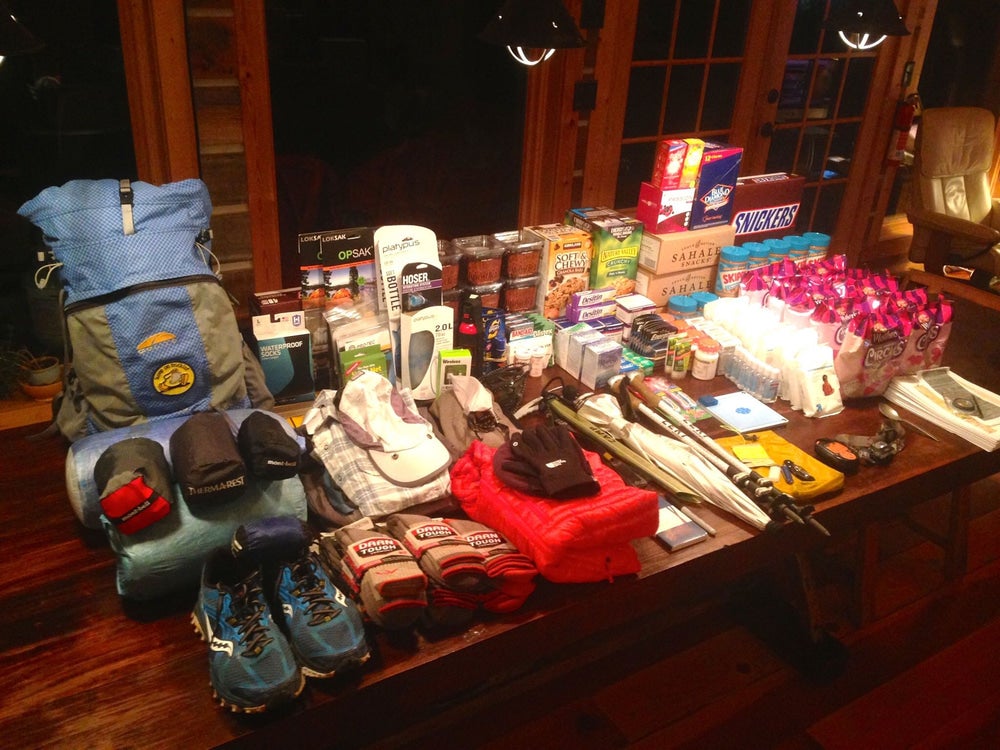
Thru-Hiking Gear
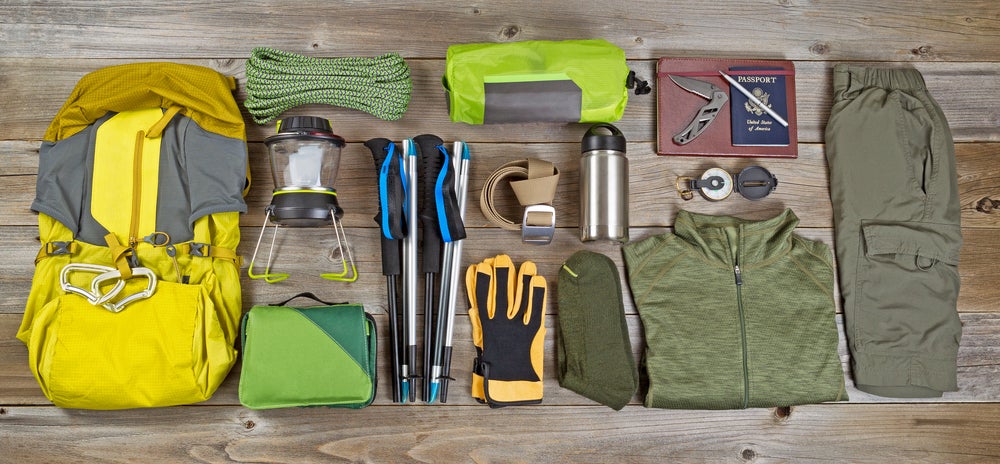
How you select and organize your gear is going to be one of the most important steps in your thru-hiking planning process. A few pounds might not affect you on a three-night trip, but they will wear you down over the course of thousands of miles. It should be said here that thru-hiking, particularly on trails as extreme as the AT, CDT, or PCT should not be the place where you test your skills with an ice axe or crampons for the first time. The terrain and extreme weather you encounter require a base level of knowledge about each piece of gear you decide to bring.
There are several “exhaustive” checklists, but many times these lists feature hundreds of items, and the reality for most hikers is that efficiently packing that many things is just not possible.
Our recommendation is to consult the top resources for your specific thru-hiking trail and to attempt to factor in multiple lists, to see what items they share and what items may seem tertiary to completing your journey. When it comes to packing your gear, there’s no alternative to deep research.
That said, we’ve come up with our own list of essentials to guide you as you build up your thru-hiking gear stash:
Shelter: This could be a tarp, a small tent, or a hammock. There are a number of different strategies here, and most likely you’ll want one of each of these at different points on your hike. The average thru-hiker will carry a tent for its versatility and protection against inclement weather, but at the end of the day, it’s up to you, the hiker, to decide.
Pack: Assuming you’re not ultralight-ing it, the median pack size is going to be somewhere between 40L and 65L. External frame packs are rarely seen anymore, but if you’re faced with the decision, always choose an internal frame pack for its packability, weight, and functionality that far exceeds the metal-barred externals of the 80s and 90s. External frame packs are much harder to fix in the case of a break, and are generally clunkier and less forgiving when hauled on long-term trips.
When searching for the right internal frame pack, focus on finding one that fits your body type and size. There are approximately one bazillion options. Ask around, read reviews, and try on lots of packs before you pick the one that’s best for you. Almost every outdoor store in the country offers free fittings in-store, so be sure to take advantage of the experts’ advice on this one!
Sleeping Bag: Almost all thru-hiking trails will at some point feature freezing temperatures—as well as scorching heat. A 15-20 degree bag is likely the best fit here. As far as materials go, down is an easy pick for its lightweight nature and compressibility, but a synthetic bag is ultimately going to keep you warmer in wet weather.
Sleeping Pad: The difference between a good night’s sleep and a night of tossing and turning can make or break your pace, energy levels, and stamina. Foam or inflatable is really the only decision to make here, though you might want to consider the hassle of blowing up a sleeping pad for five months in a row (pick the foam), and the added hassle of the pad springing a leak.
Clothing: No repeat items allowed. No cotton. Bring one of the essentials and ship yourself about twice as many replacements as you think you’ll need. You’d be surprised what a new shirt can do for a hiker’s morale. As far as jackets go, down, synthetic (primaloft), or a combination are usually the best bet for insulation. And don’t forget your sleeping socks! The end of a 25-mile day calls for something other than your dirt-stained socks. Keep your sleeping socks, underwear, and maybe an extra top in your sleeping bag at all times. You’ll feel so much better with clean clothes for sleeping.
Shoes/Boots: Fewer and fewer hikers are using heavy hiking boots. The weight, the clunkiness (the weight), and the dry out time (the weight) are all reasons that hikers are ditching the boots in exchange for lighter options. Trail runners have become the shoe of choice, and while they might not make you feel as Indiana Jones as your rugged leather boots will, your body will thank you later. That said, for heavier packs or folks with ankle issues, consider an ankle high or boot-like trail runner to give you a little bit more support. For the best of both worlds, invest in a pair of high-quality, lightweight boots. Just get ready to buy a few pairs, and to pack them in your resupply boxes, so that a new pair is available right when you need it. Anticipate your feet growing a bit (not kidding) as they flatten out and swell from the endless walking (sound fun yet?). Grab a pair of shoes that are a size to a size and a half bigger than you would normally go for.
Water Filtration / Purification: Purification tablets are easy and light. An LED light is slightly heavier but easier than tablets. The number one guideline in water purification on a thru-hike is don’t bring a pump. A Life Straw can be a nice, lightweight option as well.
First Aid Kit: A small one, please. Include the basics: antiseptic solution or wipes, duct tape, ibuprofen, sunscreen, hand sanitizer, duct tape, fire starter, gauze pads, some bandage, did we mention duct tape?
Hiking Poles: You might not think you want them, but you want them. Get the adjustable hiking poles made from the lightest, strongest material possible (likely titanium alloy). They’re more expensive but worth the investment.
Backpacking Stove: Some hikers choose not to bring one of these, but we think they’re crazy. The luxury of a warm meal at the beginning or end of a long day is just too good to sacrifice for the pack space. Primus’ backpacking stove is the premier, lightweight option when it comes to cooking on your thru-hiking trip, due to both their durable brass and steel construction and the ease of setup. With variable prices to fit every budget, and a number of rad accessories (can you say suspension kit?), Primus’ stoves are the ideal option for hassle-free cooking throughout your thru-hiking adventure.
Some additional items you’ll likely want to pack include:
- Headlamp
- Smart Phone (maps, notes, camera, keeping in touch)
- Books (Try a Kindle. Or if you insist on paperbacks, there are numerous places to swap books along the more popular trails.)
- Knife (probably not required except for cutting food, but the cool factor is almost too high to pass up)
Determine Your Thru-Hiker Diet Plan

When it comes to planning food, it’s important to remember one thing: trail cravings are real. No matter how good that Snickers Bar sounds to you right now there’s a chance that after 50 Snickers Bars the world’s favorite chocolatey carb snack is going to look like tree bark.
While there’s no universal consensus on trail-approved foods to bring along on your thru-hike, the general rules to follow include making sure your food options are relatively lightweight, ready to eat, and rich in nutritional value. Most average thru-hikers should plan to eat around 2 – 2.5 pounds of food per day, so prioritizing nutrient-dense foods is a must. A few examples of highly popular and packable food options include:
- Oatmeal packets
- Powdered milk
- Freeze-dried meals (try Mountain House or Wild Zora for some tasty options!)
- Dried fruit
- Trail Mix
- Beef jerky
- Tuna
- Dried veggies
- Instant potatoes (heavy in carbs, but be sure to mix with something else)
- Energy chews (can be on the pricier side, but offer that extra boost in the middle of a long day)
- Fruit leather
- Protein / Energy bars (can include certain candy bars, but focus on high-protein, high-carb bars)
- Seaweed (seriously!)
- Peanut butter
- Crackers
- Chocolate (just don’t overdo it)
All that said, it’s important to keep a broad range of snacks and food items in your pack, as you never know what you might be craving at the end of each day. Also, don’t forget to pack a treat or two as a reward after your longest days. If possible, stick to desserts or sweets that also offer some nutritional value (a candy bar is usually a good option), but we won’t tell if you can’t resist packing a few Tootsie Pops.
An exceptionally lightweight option for a post-dinner treat is a cup of tea, which might not sound like much, but after twenty miles and forty days on trail, a soothing mug of tea might just become the best part of your day.
In addition to the food you bring, be prepared to work in a couple of healthy meals at resupply stops (either in a restaurant or from a grocery store), and don’t be afraid to order everything on the menu. Even with the foods listed above, your body will likely be outperforming your caloric intake, so having a large (or larger than large) meal in between big hiking periods will help your body compensate for the lost calories.
In other words, when you’re hiking for five months straight, it’s basically impossible to overdo it, so feel free to order the burger AND the salmon when you treat yourself to a proper meal!
Figure Out Your Resupply Options
The most traditional option for resupplying is mailing yourself boxes throughout the hike. This requires significant planning, and you do risk missing a package if timing doesn’t work out right. But resupply boxes are a great way to ensure a consistent round of supplies at each major stop point.
Prep a Bounce Box
This is larger box filled with food, extra supplies, and gear that might seem necessary to add to your stash on the trail. The theory with a bounce box is the ability to swap the things you want with the things you don’t want, and then mail it along to the next location. Though your trail cravings can change on a dime, there’s a good chance that every time you open your bounce box, you’ll be happy with something you find.
Buy Your Food as You Go
This isn’t recommended for the entirety of your thru-hiking diet, but most trails offer enough stops that you could viably resupply on the go. Particularly along well-traveled trails like the PCT, most stores, if they’re not a full grocery store or supermarket, have supplies and food specifically for hikers. This can be an expensive option, as some of the stores have higher prices than your neighborhood Safeway, but it also allows you to indulge in the Salt and Vinegar Pringles craving that sneaks up on you at mile 347.
The following sites offer resupply location lists and plans for most major thru-hiking trails:
- Craig’s PCT Planner
- Yogi’s PCT Handbook
- Yogi’s CDT Handbook
- Planyourhike.com
- Appalachiantrail.org
- Trailsupplyco.com
Tell People Where You’re Going

We get it. Thru-hiking is a chance to disconnect, to contemplate your place in the universe, to make amends with yourself after a long period of distractedness. We want that for you just as much as you do, but telling people where you’re going is a small yet necessary step to planning your thru-hiking trip. You don’t necessarily have to give them the full run-down, but providing a few helpful target dates, check-in points, and potential visitation spots will do wonders for easing the worries of those you love.
Finally, just do it.
This article was brought to you by Primus
![]()
Check out Primus’ top-of-the-line backpacking cookware to pair with your newest lightweight stove.
Related Articles:
The Dyrt is the only camping app with all of the public and private campgrounds, RV parks, and free camping locations in the United States. Download now for iOS and Android.Popular Articles:
Articles on The Dyrt Magazine may contain links to affiliate websites. The Dyrt receives an affiliate commission for any purchases made by using such links at no additional cost to you the consumer.