 Legend
Ranger Review: Icemule Pro Cooler at Mather Campground
Mather Campground Review
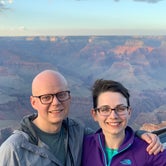
For some reason, despite never having been there before, I have always thought that the Grand Canyon is the most American of all national parks. So I planned my SW trip to start off here. We flew into Vegas and we got to drive through the Kaibab National Forest to get to Mather campground (if you can’t find any available campground reservations within the GCNP itself I would recommend checking for site availability at Kaibab). The surrounding area is much more forested than I had anticipated- so watch out for unexpected large wildlife!
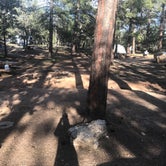
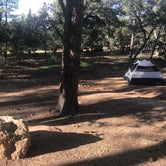
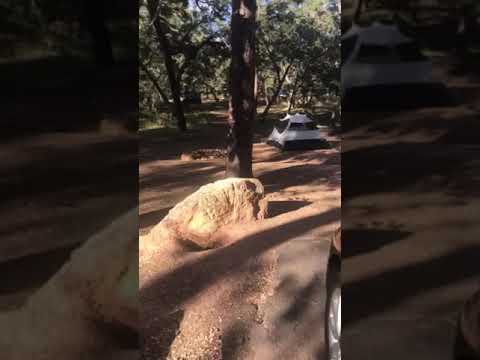
On our first night we arrived at site 260 in the oak loop slightly past sunset with enough light to find our site and set everything up. For sites 259-264 PLEASE LOOK AT A MAP to find your campsite, there is an unmarked turn to the right after site 213 to get to this section and we were quite confused when we drove through the entire main loop and then found ourselves back on a main road without encountering 260. Our site itself had a nice spread to it that made it feel relatively private despite clear visibility to the sites on either side of us. There was definitely enough room to set up 2 tents. The bathrooms were decent enough, however they are equipped with those fast-drying hand dryers that are LOUD and the noise carries well into the campground. For this reason alone I would try to avoid being in the near vicinity of the bathrooms, unless you can sleep with ear plugs in or are a heavy sleeper.
There are apparently coin operated showers at the beginning of the campground area, but we didn’t even know they existed at the time so I can’t comment on those. The bathrooms DO have an outlet between the two sinks that people use for various purposes- one morning a lady was brewing coffee, another morning I used it to quickly blow dry my hair after spritzing it (I just have a pixie, don’t hog the sink area if you are going to take more than a few minutes!).
Here are some tips that I have to share from my trip
-We were there the first weekend of June and it was perfect! Cool temps at night, relatively hot during the day, and since a lot of schools aren't out yet the tourist situation was never bad. We never had to wait on a shuttle.
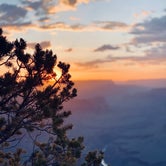
-Wake up early for the sunrise! If you are a light sleeper you will probably be woken up an hour before sunrise by your fellow campers getting ready to go watch it rise. You might as well join them. If you’re planning on hiking down into the canyon you should do it soon after the sunrise so your hike will be shaded and cooler than mid-day. We really liked the South Kaibib trail- we only went to Ooh-Aah point and back and that was a fulfilling hiking experience for us. The signs about going up being hard are all true.
-There is a nice coffee shop by the visitor center that has reasonable prices on some grab and go type food- they even have a microwave to heat up sandwiches
-Only have one night to catch the sunset? Catch it in two places! We started our sunset viewing by hopping on the red shuttle, getting off at Hopi point to watch the colors in the canyon change(the shuttle does NOT pick up at this location going back towards the visitor center), then once you have had enough of watching the colors in the canyon change color hop back onto the shuttle to Mohave point to watch the sky colors change. You have a pretty view of the sunset over the river and the furthest outlook point here. Once the sky colors are past their peak hustle back to the shuttle pickup area to try to prevent having to wait too long for a ride back. By doing this you avoid the huge crowd of people waiting to be shuttled back to the visitor center at Powell Point (Powell point is right next to Hopi point so you have crowds from both locations trying to get back).
-Are you looking for a place to charge your phone and have wifi? The nearby Starbucks does NOT have public outlets.
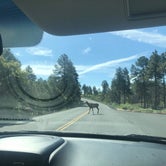
-Elk are abundant! Leave them alone! Do not get close to them to take a picture- you will more than likely never look at it ever again so it’s not worth the risk of getting hurt!
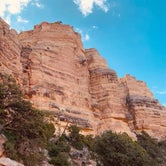
-Do the Desert View drive and get a fry bread taco from the restaurant located in the desert view tower area (the taco wasn’t fried like you can get elsewhere, but it was still really good and toppings tasted better than any other fry bread taco I have had)! My favorite Grand Canyon overlook was at the tower area- really great view of the river. Pay attention to which parts of the park you are entering and leaving though. We did the drive on our first full day there, then found out we had to go the same route the next day to exit the park towards Page. It takes a while to exit the park going this way since the speed limit starts off pretty slow. Also, going east on 64 after you leave the park is stunning. There is an official scenic overlook that you can pull off and hike a ways to and putz around at the top of a canyon.
-We found that a two-night stay was the perfect amount of time for us since we didn’t want to do a ton of hiking into the canyon (the cautionary signs are a very good deterrent) and we were still able to spend a decent amount of time at many of the overlooks.
-If you are renting a car check to make sure that you can drive to all of the states on your itinerary! We rented our car from Budget at the Las Vegas airport location that you take a shuttle to and had no idea until we got there that we were only allowed to drive to Arizona, Utah, California and Nevada! Luckily we didn't add on Mesa Verde like we were trying to at the last minute. The cars have a sticker notifying you that they have a tracker in them.
----------------------------------------
Icemule Pro Large Cooler review
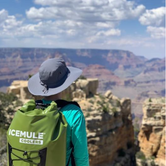
As a Dyrt Ranger I got the opportunity to test out exciting camping gear from time to time. For this camping trip I was provided an Icemule Pro Large backpack cooler to review. I was extremely excited to try this out because the only cooler that I have is a cheapo 6-pack holder that you can pretty much just use to keep a few drinks cold for an evening. I liked that this was a backpack instead of a traditionally shaped cooler or a tote bag since lugging a cooler full of consumables AND ice isn’t the most ergonomic thing in the world when you are carrying it on one side of your body or if you need to hoist it up in front of you. Wheeled coolers are also great when you have a smooth surface to pull them across, but you definitely wouldn’t bring one on a trail!
Another nice thing about using this pack instead of a cooler is that it easily fits in places that coolers don’t. We had our car pretty full of suitcases and camping gear, so this just sat on the floor behind the passenger seat for most of the trip. This is currently the smallest bag that they have in this style, and it is huge! I was considering getting a larger size, but I’m so glad that I didn’t. These are the details on the site: Capacity: 23L/ 18 cans+ ice In Use Dimensions: 17" x 11" x 14" Weight: 3.2 lbs
I used this cooler on my weeklong Southwest trip last week. For the first 3 days it was used solely as a car cooler and was filled with about 3/4 of a plastic grocery bag’s worth of food and drink and a big bag of ice that had it completely full. I would not want to carry this full on my back for a significant amount of time. The ice lasted almost 3 days when it was filled to the top with ice on day 1, which is pretty impressive considering that it was in a hot car most of the time. I am looking into loose ice alternatives since it was a pain to try to hack the ice cubes apart (they had fused together on day 2) to try to find what I wanted. Also, there isn’t a spout to release any of the melted water so you need to carefully empty the bag while preventing your stuff from falling out. I’m probably going to experiment with frozen water bottles or with the flexible ice pack sheets.
I really enjoyed this cooler when I had just a short layer of ice at the bottom and a few drinks in it for hiking. It was an odd experience hiking in the treacherous heat at the Valley of Fire State Park in Nevada (go here in the early early morning or after 5pm its amazing!) and having brain freeze from extremely chilled water.
Room for improvement
-The pads that are against your back while wearing this are quite scratchy- the first time I brought this on a hike I had to have my husband wear it since I was wearing a tank top that exposed my back to the pads.
-The chest strap(like on the majority of packs) is too low. When I have the chest straps joined together at their highest setting it cuts across my chest in an unfortunate way
-Like I said before- this thing is enormous AND there are even larger sizes!!! They only offer smaller bags in a crossbody style, but I prefer a backpack style.
-I think this line of backpack coolers is geared towards men and the crossbody style is geared towards women. This is evident in the color selection- this pack style currently comes in black, duct tape gray, olive, and camo. I like the black style the most, but I find it easier to find colored things in my storage room so I went with the olive. I do appreciate how little room it takes to store!
I would give this 4/5 stars on account of the minor details that prevented this cooler from being as comfortable as it could- mainly the itchy padding and the chest strap location. I probably would have given it 4.5/5 had there been a better color selection too (shallow, I know). This definitely isn’t a replacement for my regular hiking pack, but I’m definitely glad to have it since I’m usually hiking with my husband so we can each have a pack. There are some accessories that you can purchase to use with the icemule that I think are worth checking out. I bought their drybag for storing unsealed food in the cooler and there is also a Icemule Pro Pack dry storage compartment that you can stash on the outside of the cooler.
This item has a 15% price increase from the time I ordered it to the time that I am writing this review, so if you're interested in picking one up do it sooner than later and you should be able to get 10% off currently on your first order.