 Legend
Ranger Review: Inno Racks INH330 Review at Slickrock Campground, Moab, Utah
RANGER REVIEW:
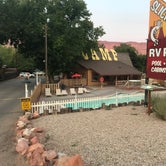
CAMPGROUND REVIEW: SLICKROCK CAMPGROUND, MOAB, UTAH http://slickrockcampground.com/
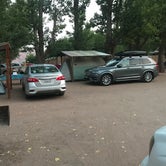
The Office/store/pool/hot tubs/laundry room/pool baths located to the right as you enter the campground..
The clerk was pleasant and informative. Registration was quick and you are encouraged to drive through the campground to choose the site of your liking. Tent sites were a flat $20.
PROS:
•Relatively inexpensive
•Pool
•Hot tubs (2)
•Stocked store
•Free showers
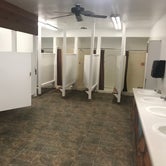
•Clean spacious restroom/shower house
•Close proximity to everything in area
CONS:
•Stacked on top of each other
•Tent sites aren’t clearly discernible
•Tent camping in Moab in August is unpleasant due to heat and blowing dust (campground cannot control this one)
•Road noise
•Pool is only open 10:00-10:00 (I really wanted to cool off at 2:00 a.m.😉)
If you are purely looking for an inexpensive place to plop your tent or RV/Camper that is conveniently located to all things Moab…choose Slickrock campground. Slickrock Campground is located directly between Arches National Park and the cool little town of Moab.
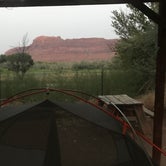
In mid-August, it’s hotter than hot…87 degrees at night with no wind (which may keep you up at night) as I write this at 1:00 a.m. 108 degrees during the day.
Very diverse crowd, as foreigners choose economy camping to tour USA. Which is pretty cool.
RV/Campers have full hookups/electric and are priced higher, and A/C Cabins are also available for rental.
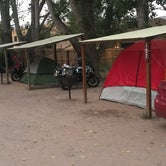
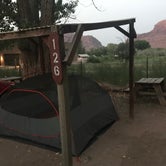
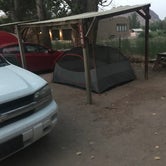
Tent sites are entirely dirt/powered sand. No electric, no water. Some offer a corrugated plastic shed roof shelter, others do not. We were early enough on a Sunday to secure a shelter. We also waited until evening to erect the tent due to a fine dusty sand that permeates everything…and to attempt to keep things cooler. Each site has an elevated charcoal grill and a stunted picnic table. If you drive a small economy vehicle you park that between the grill and your tent for line of sight barrier from your neighbor. The slightest squeak is heard from site to site.
We chose site 126, along the back of the property, furthest from the roadway. We still needed earplugs. A property line wire fence separates from the neighboring company that just so happened to leave their overhead light on all night…a small annoyance. Site 127’s vehicle was a few feet from our tent. No measure of privacy. But again, the price for the area…and a pool.
Arches National Park is 3 minutes north, Trendy Moab 3 minutes south. We visited both. Being a cyclist,..it’s Nirvana. Never have I seen so many bicycle/outdoor shops within one square mile…I trembled with excitement.
If you are looking to get away, enjoy solitude and be immersed in nature…Slickrock Campground is not for you.
If you are looking for a place to lay your head with pretty decent amenities within a rocks throw of all things cool…Slickrock is a great choice.
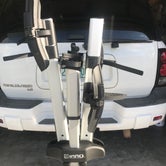
PRODUCT REVIEW: Inno Racks INH330 Two Bike hitch mount.
Inno Racks is not new to the bike rack community. Originating in the 60’s in Japan, they have been in the U.S. for almost two decades. Inno Racks offers several dIfferent style bIke racks, as well as attachments for wInter sports, water sports and cargo boxes. http://usa.innoracks.com/
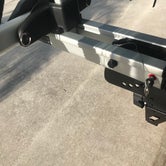
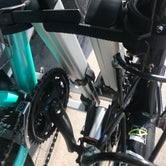
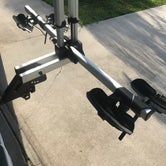
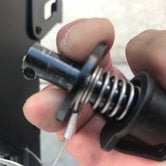
The INH330 came packaged lIke Fort Knox…every part securely In Its place. No assembly required. DIrectIons do come wIth the rack, but adjustments are intuItIve and simple. Pop-pIns secure the wheel trays either flat for mountIng bicycles or uprIght/folded for storage. A pop-pIn also allows for angled tIlt.
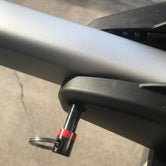
The Inno INH330 can fit eIther 1.25 or 2 Inch receIvers and comes wIth an allen key to help wIth that transItIon.
Also Included Is a four foot cable and keys to secure your bIkes or rack to your receIver via an integrated lock.
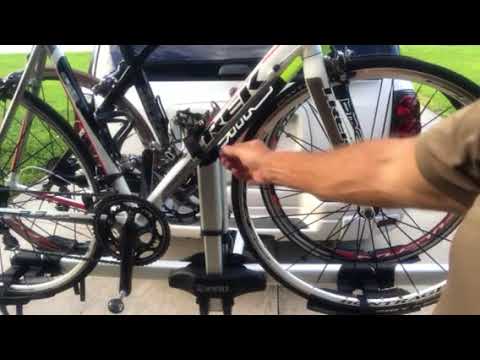
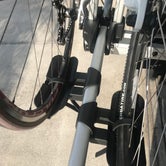
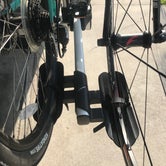
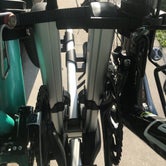
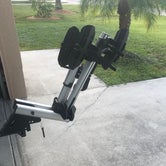
Adjustable Wheel Trays slide along the horizontal rails to accommodate bicycles of varying lengths. To adjust, simply unloosen a large nylon wingnut and slide…when the wheel tray is in the desired position, tighten the wingnut securely. That simple. Each Wheel Tray has a dual ratcheting strap that is slipped through the bicycle wheels spokes and over the rim to secure the bicycle wheels and prevent the bicycle wheels from bouncing out of the wheel trays during transport. Wheel Trays accommodate tire sizes from less than an inch wide to five inches wide.
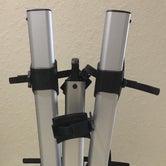
Frame Attachment: The Inno INH330 utilizes two vertical telescopic/ratcheting center posts with swivel-style ratcheting adjustment strap for each bike frame. Directions display this attachment on the bicycle's "down tube." The strap has both a sliding rubber bushing and a rubber pad on the center post to prevent damage to the bicycle finish. I found that I could also utilize the "seat tube" for attachment to the vertical attachment posts…if a water bottle cage was not attached to the bicycle seat tube.
Once secured properly at the horizontal center post and each wheel tray, the bicycle was held fast…no movement was observed…which is imperative if you don't want damage to bicycle frame or finish.
Removal is equally quick and simple…both the bicycles from the carrier and the carrier from your vehicle. (See video below)
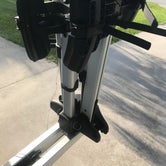
A single Pop-pin through each horizontal wheel tray arm pops out with a pull, which allows you to fold the wheel tray arm up and re-insert the pop-pin. A directional pop-pin secures the INH330 in your vehicle's receiver, a push and twist removes the pop-pin and the bicycle carrier can be slid out of the vehicle's receiver. A centered T-handle between the vertical/ratcheting posts allows you to easily carry the INH330 to storage. At 30lbs, the INH330 is manageable.
Final Thoughts:
Overall, I liked the simplicity of the INNO INH330. Over the past four decades I have owned a myriad of different bike racks from various high profile companies…roof mounts, gutter mounts, window/trunk mounts, and hitch mounts. Some racks required removal of wheels with fork attachments. I suppose each have their place. For fuel economy reasons, I no longer desire a roof rack style carrier. The rear liftgate/trunk style rack has contact points on my vehicle's paint, which I no longer desire. The hitch style is my preferred method of attachment as it prevents the rack from stealing away fuel consumption, it doesn't mar my vehicle's paint or dent it's metal, furthermore, I have easy accessibility waist-to-shoulder height to my bicycles (a plus for aged and repaired shoulders).
I believe INNO Racks has a winner! (I would like to see the ability to add a third and fourth bike attachment, though😏).